Quick start
Create a project, add an entity, save a scene and learn the viewport gestures in a few minutes.
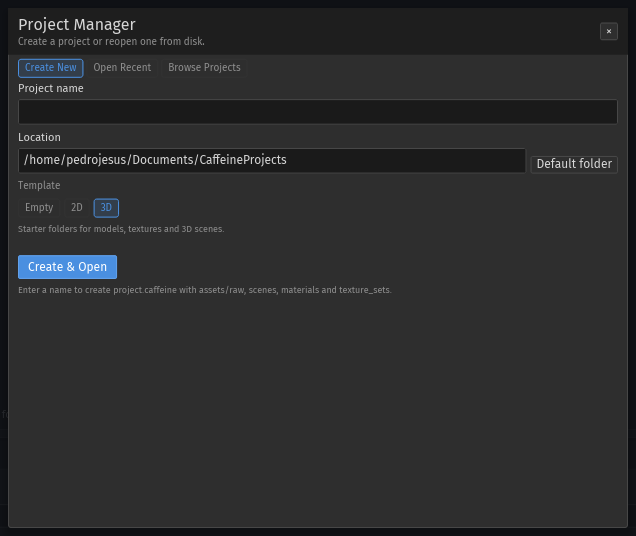
1. Create a project#
Launch Doppio without arguments:
cd doppio
cargo run -p doppio-ui
In the project manager:
- Open Create New.
- Enter a project name and a location.
- Choose Empty, 2D or 3D.
- Press Create & Open.
Doppio writes project.caffeine and creates assets/raw, assets/processed,
scripts, scenes, materials, texture_sets and build. The 3D template also
prepares model, texture, material, animation, audio, prefab and sky folders under
assets/raw.
2. Meet the workspace#
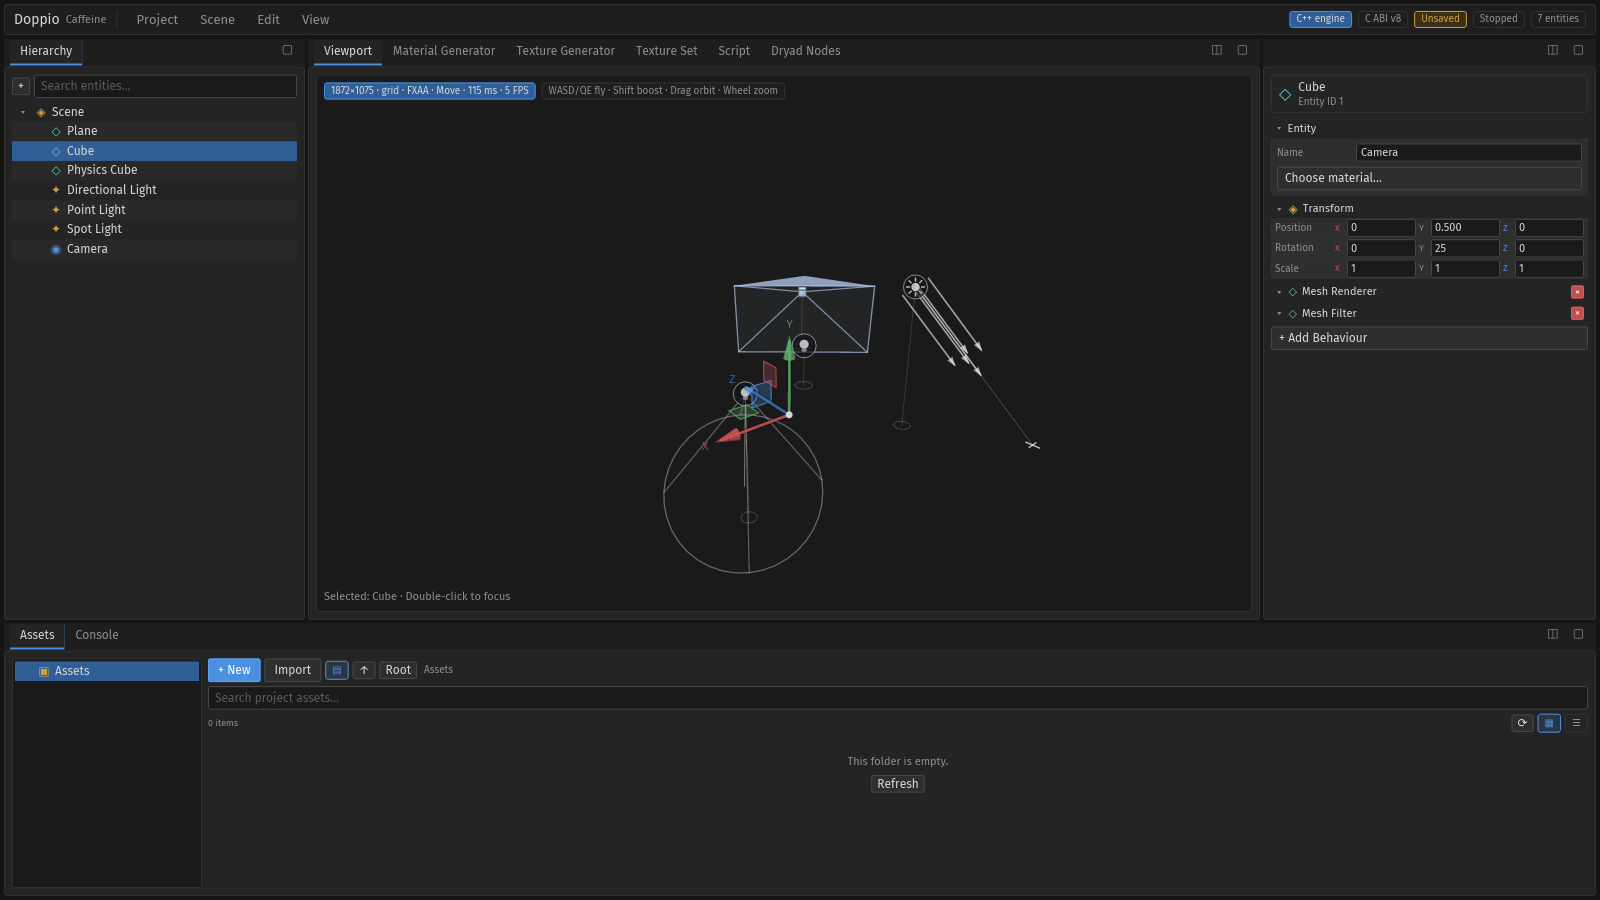
| Pane | Tabs | What it does |
|---|---|---|
| Hierarchy | Hierarchy | Scene tree, search, add/delete entities and drag-to-reparent. |
| Centre | Viewport | Engine render, selection, gizmos, scene markers and camera flight. |
| Material Generator · Texture Generator · Texture Set · Script · Dryad Nodes | Content tools that share the centre pane; drag their tabs to another pane. | |
| Right | Inspector | Entity name, transform, component cards and Add Behaviour. |
| Material · Nature · Water · Terrain | Asset and procedural generators with live previews. | |
| Bottom | Assets · Console | Project browser with import/pack, plus typed and filterable logs. |
Drag a tab away from its header to dock it in another pane. The docking guide shows
the centre and edge targets; the pane buttons maximise or restore a pane. View
presets live in View → Default Layout (Ctrl+1) and View → Viewport Layout
(Ctrl+2).
3. Add an entity#
- Press
Ctrl+N, use Scene → Add Entity, or press the + in the Hierarchy. - Select the new row; the Inspector shows its Transform card.
- Open Scene → Create Entity… (
Ctrl+Shift+N) for the prefab palette: mesh, lights, camera, physics, terrain, water and duplicate selection. - Edit Position, Rotation and Scale, or drag the gizmo in the viewport.
Parent groups compose their transform into their children; the gizmo projects the resolved world position.
4. Move around the viewport#
| Input | Action |
|---|---|
| Drag in the viewport | Orbit the camera |
| Right or middle drag | Pan the camera |
| Mouse wheel | Zoom |
W A S D |
Fly horizontally |
Q / E |
Fly down / up |
Shift |
Fly boost |
1 / 2 / 3 |
Move / Rotate / Scale gizmo |
G |
Toggle the grid |
F |
Frame the selection (focus) |
Ctrl+0 |
Reset the camera |
The viewport HUD shows resolution, grid state, gizmo mode, view model, FPS and the lighting overlay. Rendering is offscreen and asynchronous, so the UI stays responsive while the engine renders.
5. Save the scene#
Press Ctrl+S or use Scene → Save Scene. Scenes are .caf files; the title bar
shows the scene name and a Saved badge. The inspector and hierarchy edits are
undoable with Ctrl+Z and Ctrl+Shift+Z.
Next steps#
- Editor UI gallery for a visual tour of every pane.
- Scene viewport for rendering and camera details.
- Headless testing to script the same steps without a window.